Showing posts with label onions. Show all posts

Thursday, November 4, 2010

New Plans and Storage Crops

I have been sketching out plans for the 2011 garden already since we need to build some new beds, and I am still lacking space (of course- is it ever enough?).  This means I must prioritize what I want to grow, and weigh that against what I should grow.  Taking stock of what I have sitting in my pantry yesterday was insightful, and it will help me assign crop space for next year .  There is a decent amount of food put by in canning jars and freezer bags as well, though much of it is fruit we picked elsewhere.  I have herbs, kale, green beans, tomatoes/tomato products, pesto, raspberries, and currants from my own garden stashed in the freezer.  Relishes, sauces, jams etc. are on the shelves, but it is the for a pantry I am interested in.  Those high calorie, get-you-through-the-winter roots.

Here she is, my mixed bag of tricks "pantry":
 China, stem-ware, animal chow, and dirty vegetables!

Now for the walk through.....what is left of my globe onions:
(I am not going to bother growing these next year,
 space is at a premium and onions I can buy anywhere.)
Garlic braids are hanging, and I also have an allium drawer with shallots, a few heads of garlic,
 and more red onions, some of them globe, some of them a long heirloom variety:
(Onions are not my best crop.)
Next are the potatoes, and they are everywhere.  The bag holds my fingerlings, 
and the box holds potatoes from a friend's garden.
This drawer has Purple Viking, Keuka Gold, Red Cloud, and Russets:
Sweets:
And that is it.  No winter squashes from my garden unfortunately.  I have made peace with the need to just buy them from others.  A friend and I split a bushel of butternuts from a local farm, so I have a small stash to admire and cook up as I please (and an acorn with a price tag, sigh):

So would you all make my week and post what you have for storage crops, and how you store them?
Canned goods and stocked freezers are always fun to see too.
Share your thoughts on the amounts you grow, what you are pleased with, and what you would like to improve upon.  Winter will quickly be upon us and we will dreaming of digging the earth again come spring, so link your posts in the comments section and show us whatcha got!!

Tuesday, September 14, 2010

Garden Update

Well, it is about time I do a garden update.  Luckily a few things continue to produce despite my severe neglect.  Tomatoes, peppers, and cukes continue to ripen despite the cool night temperatures.  Raspberries and green beans are still producing, and then there are those leeks that I will be harvesting in the months to come.  Almost all greens have been eaten by creatures, only the carrots under plastic protection remain from my many, many sowings in recent months.  Thank goodness the chard from spring is 'cut-and-come-again' or I would have nothing green and leafy to harvest.  Ever.

I am dying to know what the sweet potatoes will give this year.  They are vining like mad, but the last time I peaked in there was not any tuber formation to speak of.  I am behaving and staying out of there for now, and desperately hoping for some kind of harvest in October.

The Yellow Potato Onions arrived (and there they sit in their box).  These are multiplying onions.  Think shallots...only onions, and that about sums them up.  I keep telling myself they are all I will grow for onions next year, but who am I kidding?  I just need a bigger plot.  These babies will need a few years to get established and start providing more than seed.

Saturday, April 3, 2010

Garden Awakening

First, let me start by saying I am so behind on posting!  I started a few drafts this past week and never finished any of them off.....so here is my collection of photographs from this past week, along with a garden update.

I just did ANOTHER order from Johnny's.  I was labeling cow pots for transplants and came to the realization I don't have enough.  I had been eyeing a few seeds as well, mostly thinking ahead for Fall and Winter harvests.

The spuds from Moose Tubers were delivered this week, boy do I hope I have a better potato season in 2010.  They look lovely, I only had to toss a few with rotten spots.  LaRatte, Purple Viking, Red Gold, and Keuka Gold are being chited.


Everything is budding, blooming, and breaking ground in the garden/yard.  My asparagus is growing an inch a day (or so it seems), I gave it a top dressing of amendments and compost a few days ago to help it along.  This is a picture from earlier in the week, I should start measuring the growth they actually put out in a day, it would be funny wouldn't it?


Fruit trees and bushes budding out (Currant, Apple, Raspberry, Strawberry etc).........the only fruit not showing any signs of life is the grape vine.


I had taken some pictures of the standing ground water, here is a shot of my driveway, and our wetlands- otherwise known as the backyard:


We were very fortunate not to have a wet basement, crazy how many things were (and are) under water here in MA and RI.

In other news, I have been having one heck of a time getting some varieties to germinate this year.  Last year I had just about 100% all around, this year I am far from it.  I am not sure if it is the seed sources (heirlooms from various sources) that is the difference, I guess I will sow more than 2 seeds for peppers and tomatoes going forward.  Most of the nightshades are needing to be thinned, but a couple tomatoes (Pink Brandywine and Amish Paste) along with most of my new peppers and some onion varieties from last year are not cooperating.  Last year it was the string beans that would not germinate for me, looks as though this year it is peppers.  Sigh.

I planted some Egyptian Onions that I took from my Mom's house last summer, they should have gone in back in October, but I forgot.  These will multiply over the years and provide some green onions for garnishing  with if they take.  (In this picture you see the top of the onion which I cut last year and planted in a corner of one bed.)


I like the idea of multiplier onions.  Of anything that is perennial in the kitchen garden I guess.....I will try my hand with yellow "potato onions" this year as well.  I hope they be happy this far North.  I have only seen them in Southern seed catalogs, so I am guessing that is their preferred local.  I would be quite pleased to not have to grow out onions every year going forward, seeds are a pain and sets are costly.....it would be sweet to have the potato onions as a main source through out the year.

Enjoy the weekend everyone, we will be mulching the beds and playing in the dirt for most of the day.  :)

Saturday, January 23, 2010

1st Seed Sowing of the Year/ Seed Sowing 101

The Biodynamic Sowing Calendar shows Sunday, Monday, and Tuesday as root days, meaning that is the part of the plant enhanced by the Moon or planets.  So today (a fruit day) I decided to begin my 2010 gardening season.  Early?  yes.  A few couple of my onions like 10-12 weeks of growing before being set out in late April.  The spinach and kale will go under cover (either under reemay and plastic, or in the cold-frame).   I love my new set-up, I was able to complete this task in my kitchen with little to no mess.  Below is basic tutorial on indoor seed sowing.  I know all you regulars could do this stuff with one arm tied behind your back, but for any newbies out there searching the net for hours on end (as I was not so long ago), this is for you!


1. Gather materials.  Here I have some organic seed starting mix, a water bottle (and a cup off to the side) and my potting tray.  Today I will be using a 72 cell Pro-Tray (good for small seeded herbs & flowers, lettuce, leeks, onions, beets, endive, and kohlrabi (YUCK!)).

2.  Spray surface of soil with fine mist, or in my case continue to moisten by dumping a cup of water over moistened surface soil.  You want the mix to be moist, not real wet.  I go for a consistency that will lossely clump in my hand when squeezed.  This wetting of the mix can be done in a bucket or wash bin.

3. Scoop/pour/dump mix onto flat and brush across into cells.  Fill to the top and then compact.  If you have 2 trays of the same size use one on top to gently apply pressure into the cells below.  The seeds I was sowing today required a 1/4-1/2 inch of depth.  Below I have my Chipollini rows labeled, the seed in the dish, and the mix lightly pressed to the desired depth- ready to begin sowing!


4.  Drop desired amont of seeds into individual cells, be sure to mark the variety sown and date if you are sowing more than one variety in a flat.  The seeds can be difficult to see and remembering what just went where can be easily forgotten or confused, especially when small children are interupting the task.
Two seeds were sown per cell on the onions and kale, I did 3 for the spinach since spinach seed deteriorates quickly with age, and these are 2009 seeds.  There are many methods of getting the seeds placed where you want them....I either drop a couple in by hand or use a small dish and a plant marker to slide 'em in as I go.


5.  I used the dish pictured above to dust the top of the tray with mix after all cells were sown.  Take caution to not dislodge any seeds when smoothing out the mix over the cells.  One could also just spoon mix into each cell and avoid this risk.  Once the cells are topped off, spray with a gentle mist to moisten.  My seeds were covered with a dome to help retain moisture.  Some seeds will now require being placed on a heat mat, but the varieties I sowed prefer a cooler soil temperature (50-75 degrees) so they just went onto the heated floor in my bathroom.


6.  Keep soil most during the germination period.  As soon as you see green get the seedlings under lights.  My light et-up will be assembled this weekend, stay tuned!

Saturday, August 29, 2009

Chip-oh-LEE-nee Onions

These little discs of onion heaven were available as part of my CSA share this week, YAY! I have always wanted to try them, thought about trying to grow them, but decided on the familiar sweet and red globe onions instead. Well here they are, right in my very own kitchen. Roasting seems to be just about all you can (or should) do with them, but I can't help but thinking they would make a nice Onion Soup for two! If only I had more than half a pound....


Dr. Gourmet.com says this about Cipollini Onions:

"Pronounced chip-oh-LEE-nee this is a smaller, flat, pale onion. The flesh is a slight yellowish color and the skins are thin and papery. The color of the skin ranges from pale yellow to the light brown color of Spanish onions. These are sweeter onions, having more residual sugar than garden-variety white or yellow onions, but not as much as shallots.

The advantage to cipollinis is that they are small and flat and the shape lends them well to roasting. This combined with their sweetness makes for a lovely addition to recipes where you might want to use whole caramelized onions.

These can be a little more difficult to find as they are not as popular. Specialty markets and grocery stores will have them but even my Whole Foods has spotty availability. They are harvested in autumn and may not be easily available year round (or may be quite expensive in other seasons). "
Maybe I will roast them and do a BBQ Chicken Pizza, substituting them for the usual caramelized red onions........when all else fails put it in a pizza, thats my motto!

Wednesday, June 24, 2009

Other People's Gardens


Another post not about my garden. Hey, what else is there to do when the rain just doesn't stop and you have little to harvest? Make stuff with food from other people's gardens!
(Speaking of other people's food, my1st CSA pick-up was today: 1 head lettuce, 1/4 lb salad greens, sm bunches of kale and swiss chard, 1/2 doz. eggs, 1 kohlrabi, quart of strawberries, and cheese.)

All this dreary weather is making me think of the fall and winter months, which makes me dream of baking pies. Today I made the Blueberry Pie Filling (recipe in previous post). The recipe made 5 pints so I will do another batch soon in order to have batches frozen in 2 pint quantities, enough for 5 pies in all.


My blogger friends Erin over at Garden Now-Think Later! and EG at Engineered Gardener have been busy making blackberry jam and it has been looking yummy! So, I dug out some set aside recipes I have been wanting to try and washed up the Ball jars and got my canning on. These are the recipes I used for Sweet Onion Preserves and Jalapeno Strawberry Jam, thanks for the inspiration!!:

http://www.discusscooking.com/forums/f94/sweet-onion-preserves-13516.html I substituted a mix of white wine, white balsamic, and red balsamic vinegars in place of the tarragon vinegar, and used rosemary and sage in place of the fresh tarragon.
http://allrecipes.com/Recipe/Jalapeno-Strawberry-Jam/Detail.aspx This is all that was left of one of the jars come evening after making the jam. We all had some poured over cream cheese with crackers, and then my 2 yr old decided she was just going to go for straight for it and began eating spoon fulls right out of the jar. This recipe isn't too spicy, if you are looking for some real heat you need to kick the type of peppers up a notch. Used more hot red cherries than jalapenos but the cherries had less fire than I was expecting. Can anyone give me lessons on the world of hot peppers?
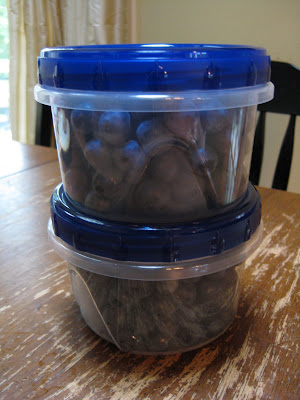
I saw these containers and thought they would be perfect for freezing individual pints of berries in.

Monday, June 22, 2009

Garden Tour


This first picture is of my blustery back yard, now you can fully understand why my garden is in the front yard.

My messy garden needs some clean-up! As you can see I am still in the 'container planting phase' which is ridiculous considering we are almost into July, darn weather, so pardon the bags of soil, peat pots and containers scattered about. I will post some close ups of the planted containers another day. The kitchen garden is made up of six beds; 4 are constructed with 1x8 cedar boards; 2 are deeper with a combination of 1x boards. How deep you ask? I forget. 12 and 18 inches maybe? I am sure my husband didn't forget since he was lucky enough to rip the boards down to size. (thanks honey!)


The first bed is home to my asparagus (and some peas and milkweed for fun). The second has three rows of tomatoes. There are a handful of basil plants through out along with a row of red onions and 2 rows of cut-n-come again lettuce interplanted.


The third and fourth beds are Cucurbits and Roots. The one in the foreground is divided into 3 sections and contains carrots and herbs; potatoes; carrots and sweet potatoes. The vertical bed behind has cukes, winter squash seedlings, marigolds, and sweet alysum. Some of these seedlings are too small to be seen.


In the fourth bed I have legumes, beans, peppers, onions. the peppers were stuck in to separate the legumes and onions since they do not enjoy being neighbors.


The final bed is the one that gives me trouble. A few plantings of spinach, beets, and chard have been ripped out and started over or replaced with something else. Currently it holds a variety of salad greens, 2 rows drying beans(pole), bush beans, another row of pole beans, zinnias,3 peppers, 1 eggplant and some bunching onions. It's picture can be found below in the last post.